|
This short tutorial provides an illustrated overview of the main steps involved in 3D digitizing a human head from the actual lifecast of a human being using Scribe-iT, MicroScribe 3D and 3ds max.
Creation of the head
model began with a plaster head cast of myself. This was a hold over from
my days doing special effect makeup. If you want to learn more about lifecasting,
check out some of the books and tapes at http://www.burmanfoam.com
or http://www.monstermakers.com.
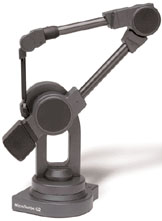
I decided to digitize the models using simple polygons instead of Splines or NURBS. I used a Microscribe 3D with the
Microscribe-MAX plug-in [now called Scribe-iT, both from GHOST 3D, LLC].
This software allows direct input of polygons
or Splines into 3ds max, and other programs. A red color pencil was used to mark the grid pattern
onto half the head (this is a critical step for desirable geometry, see image below). This worked great since it allowed easy changes by
erasing and re-marking if needed. The planning of the vertex structure
is crucial for a good clean mesh. Much care was taken to ensure a minimum
amount of isolated triangular faces, as well as flowing contour lines.
Here is a look at how the markup lines were laid out on the head, which were scanned with the digitizing software to create the 3D geometry:
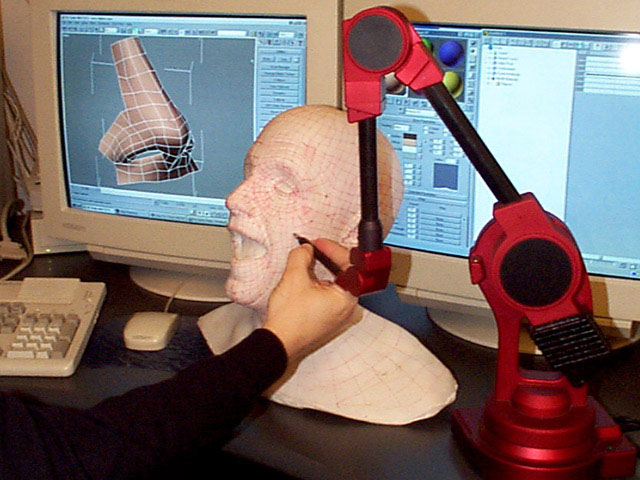
Digitizing was done
in separate sections/objects (front face, ear, back, etc.) then those sections were merged together into one seamless piece of surface geometry. The resulting geometry was collapsed into an Editable Poly object from one half of the
head. This was cloned using mirror/instance to allow visualization of
the entire head while only editing the original half. 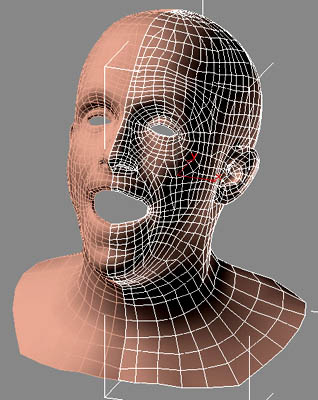 See image below. See image below.
The model was cleaned
up as well as detail added using the tools in Editable Poly. Additional work was done to the mouth area to enhance the screaming expression that
did not come out to my satisfaction in the original lifecast. Also, the Solidify modfier was used to create the faces inside the mouth.
This is a little too complex to go into in great detail, but simple edge
extrusions would be a more straightforward way to do this, although more
time consuming. Once satisfied with the half head model, it was attached
and welded to the mirrored half resulting in a whole head, which was also subdivided (tesselated) to increase resolution. Then using
a photograph of me as a background image, the head was distorted using
FFD's and "edit mesh/vertex move/affect region" in order to
create the proper asymmetry (giving a more realistic final model).
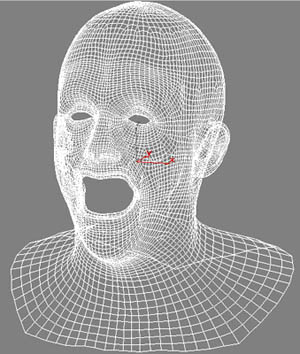 A look at the resulting 3D surface geometry that was digitized, merged, and subdivided: A look at the resulting 3D surface geometry that was digitized, merged, and subdivided:
|
 MicroScribe 3D Digitizers
 FaroArm OEM Partner/Distributor